Would you like to transfer or synchronize data?
You can try FREE APPLICATION from online stores:


PhoneCopy.com is a reliable way to keep your contacts safe. Follow this guide to learn how to back up your Nokia Asha 308 data quickly and without any technical knowledge.
This guideline also works for similar devices like Nokia 3080, Nokia Asha 305, Nokia Asha 3050 Dual SIM, Nokia Asha 306, Nokia Asha 309, Nokia Asha 310, Nokia Asha 311.
Phonecopy client registration is simple. Choose your username and insert your email address, where we will send you a confirmation email that you will need to activate your account.
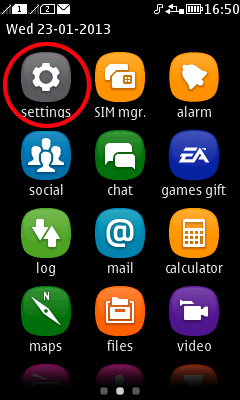
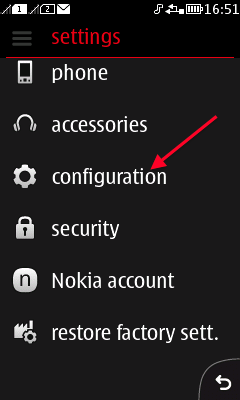
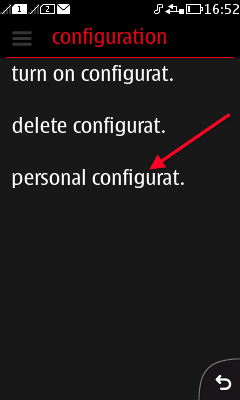
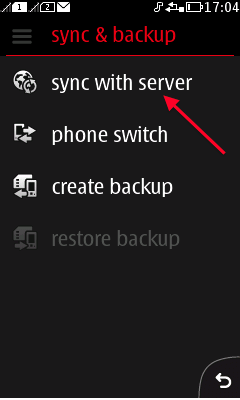
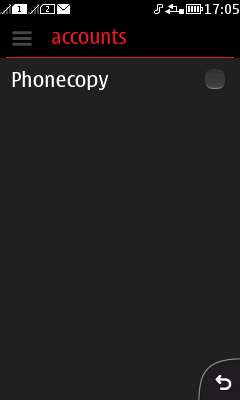
To have your contacts saved you have to synchronize the Nokia with PhoneCopy. First step is to set up the synchronization on the Nokia. For better illustration, we've made some screenshots, but experienced users naturally won't need and will be able to set up the phone on their own, or following the device manual on PhoneCopy website. But back to the screenshots now: create a new synchronization profile in the menu:
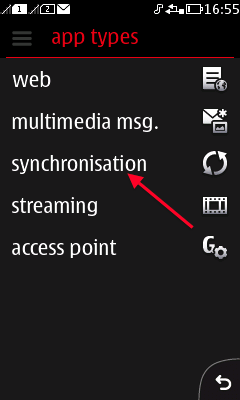
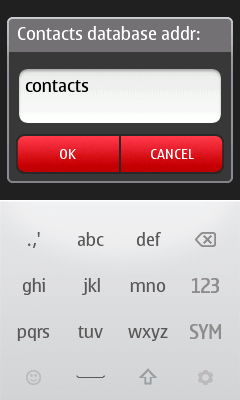
Follow the instructions to set up the connection. Choose your username and password. Fill in Server and Account name according instructions. It is possible to backup your contacts, calendar or notes.
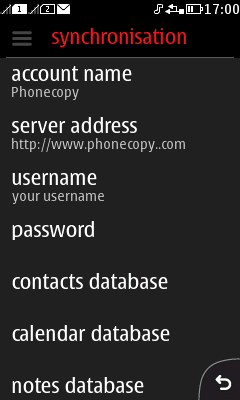
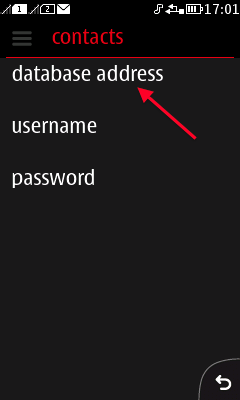
Follow the instructions and continue to synchronisation.
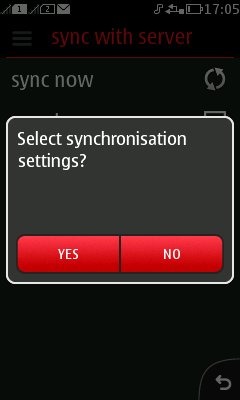
Start the synchronization now.
After your phone is synchronized, go back to your PhoneCopy online profile (probably you will have it still open in the browser since you activated your account) and accept the assignment of your phone to the account. If you do it within the hour after the synchronization, the phone will be assigned automatically and you will only need to confirm the process. If the delay is greater than one hour, you will be asked by the server for the cellphone's identification number, called IMEI. This number can be easily found under the battery of the cellphone, or you can type in the symbols *#06# and the IMEI will appear on the display.
Download PhoneCopy for Windows to your Windows PC, which you can download free of charge. After downloading and installation PhoneCopy icon will appear on your desktop.
Start the application and small PhoneCopy icon will appear on right bottom corner of your screen on status bar. When you will press this icon at first time you will be asked to fill your username and password. Any next icon click will start synchronization.
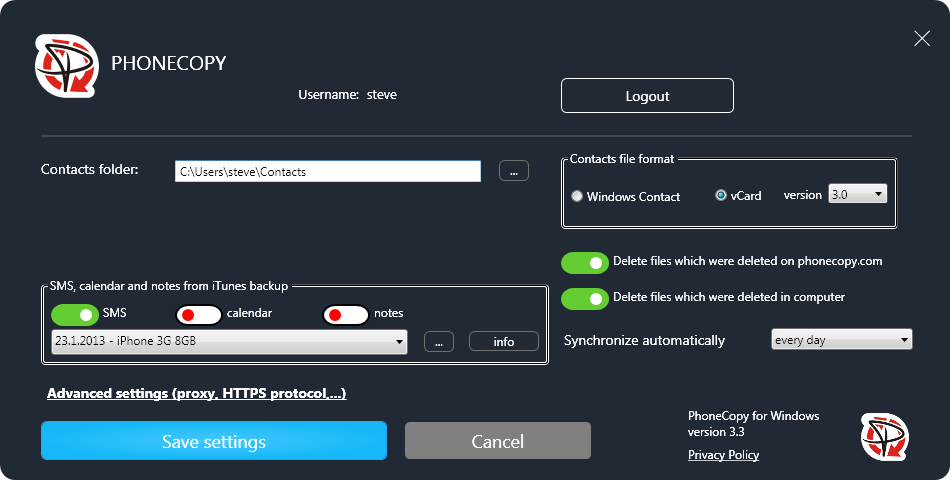
Start PhoneCopy for Windows. Fill your PhoneCopy username and password, then select the local directory where you stored your contacts, and choose VCARD format which will be used (we recommend to use 3.0 which is pre-selected - this is the right option when you are looking to import contacts from .vcf). Another option is to use native Windows Contacts format and synchronize directly from/to Contacts folder. Moreover, you can set your proxy on the same screen.
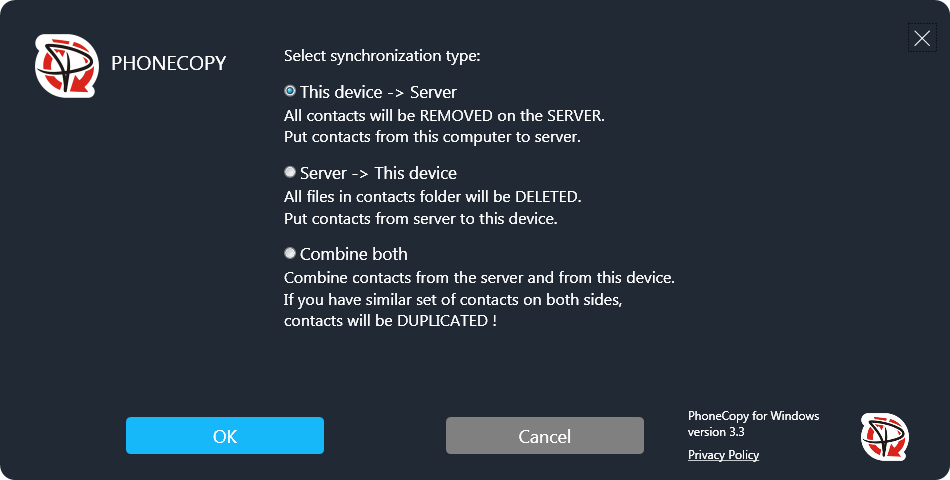
Now you can start the first synchronization on your Windows to transfer your contacts from/to PhoneCopy server. When synchronizing for the first time you can select synchronization direction. When you will add any VCARD contacts to selected directory you will see it synchronized to PhoneCopy after next sync. Status bar icon is animated during synchronization process.
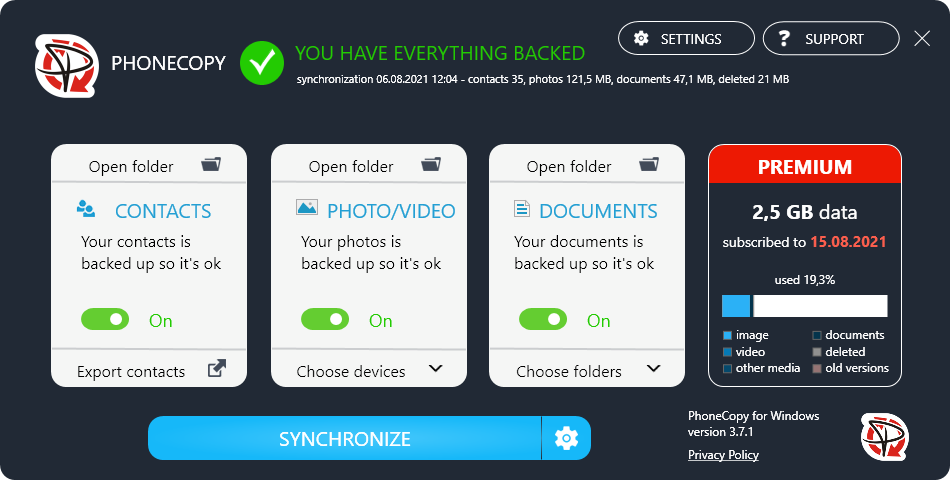
When synchronization finish you will get confirming message.
This guideline also works for similar devices like Microsoft Windows 2000, Microsoft Windows 2003, Microsoft Windows 2008, Microsoft Windows 7, Microsoft Windows 8.1, Microsoft Windows 98, Microsoft Windows ME, Microsoft Windows Vista, Microsoft Windows XP.
Your data is now safe on PhoneCopy. The service stores a full copy of your contacts online, so you can access them from any device or restore them whenever needed.
You can easily remove duplicate items among your contact list or SMS messages. Just go to the Contacts (or SMS) section and choose More Actions -> Search for duplicates. Detailed wizard will help you to solve this kind of problem easily.